As an Amazon Associate, we earn from qualifying purchases. Some links on this site are affiliate links at no extra cost to you. Our recommendations are based on thorough research and editorial judgment.


10 Simple Wooden Wedding Arches You Can Build

You'll love these gorgeous DIY wooden wedding arch ideas that won't break the bank! From the classic triangle design that needs just three pieces of lumber to the show-stopping hexagon arch with its modern geometric flair, there's a perfect style for every ceremony. The basic triangle arch costs only $50-70 and stands 7-8 feet tall – perfect for that magical moment! We're especially excited about the ladder-style arch that repurposes vintage finds into something truly special. Whether you're dreaming of rustic charm or elegant simplicity, these 10 wooden arches will transform your ceremony space into something beyond your wildest dreams. Let's explore these beautiful options together!
Key Takeaways
- Basic triangle wedding arches require minimal materials and tools, costing only $50-70 with pressure-treated lumber for outdoor ceremonies.
- Geometric hexagon arches create modern appeal using six pieces of 2×4 lumber cut at 30-degree angles with pocket-hole connections.
- Double post garden arches offer impressive width at 120 inches and break down easily for transport and setup.
- Ladder-style arches repurpose vintage ladders connected by wooden planks, creating a unique backdrop for rustic or elegant themes.
- Curved top wooden arches made from CLS C24 timber or Western Red Cedar provide an elegant focal point for ceremonies.
Basic Triangle Wedding Arch
Many couples choose a basic triangle wedding arch as their ceremony centerpiece due to its elegant simplicity and ease of construction. I've seen firsthand how this timeless design can transform any outdoor space into a magical setting for your special day!
When it comes to wood selection, you'll want to start with 2-3 sturdy pieces of 2×4 lumber – and trust me, pressure-treated wood is worth the extra investment if you're planning an outdoor ceremony. The typical height of 7-8 feet provides perfect clearance for most venues. You'll need basic tools like a circular saw and drill, but don't let that intimidate you! The construction process is surprisingly straightforward, and you'll be amazed at how quickly it comes together. Lightweight designs can make the setup even easier, especially if you're planning to transport the arch.
Arch placement is essential for creating that perfect backdrop. Once you've assembled your triangle frame using half lap joints and secure screws, you'll want to make sure it's properly anchored – we don't want any wobbling during those precious vows! Add your personal touch with flowing fabric, artificial flowers, or twinkling lights. The best part? You can create this stunning focal point for around $50-70, leaving more room in your budget for other wedding must-haves!
Recommended Products

Includes 4 gallons of Rid O' Rust liquid rust stain remover (part # 2662) and 4 half-gallon bottles of Rid O' Rust 2X Concentration Rust Preventer (part # RR1)

Adjustable length log rack
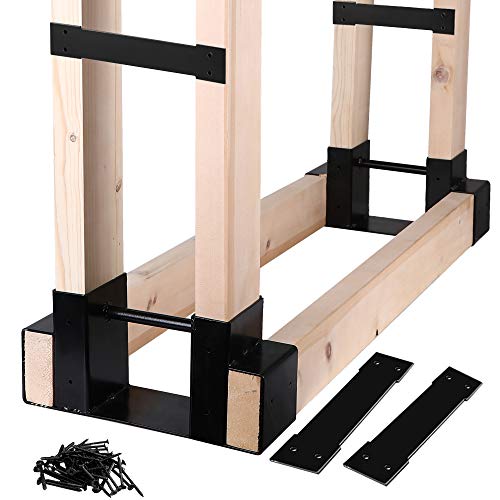
WHAT YOU GET -- A pair of firewood log brackets with wood screws,13.2" *3.7"*6". (Lumbers are not included).
Geometric Hexagon Arch Design
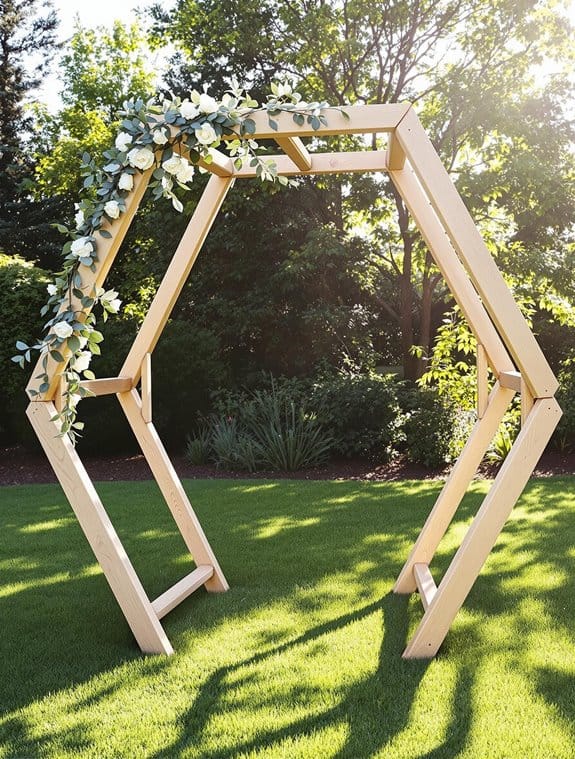
For a modern twist on traditional wedding arches, the geometric hexagon design offers striking visual impact and exceptional stability. You'll love how this stunning structure transforms any wedding space into something truly magical! The hexagon measurements create perfect 30-degree angles that'll make your arch stand out from typical designs.
Getting started is easier than you might think! Using your miter saw, cut six pieces of 2×4 lumber at those precise 30-degree angles for the frame. I've found that the pocket hole jig is your best friend here – it'll help you create those strong, seamless connections that make the design aesthetics simply breathtaking. At two pocket holes per angle, you'll achieve maximum joint strength. Add horizontal bracing with 2×3 lumber to guarantee your arch stays sturdy throughout your special day.
When it comes to the base, you'll want to rip your 2×6 lumber down to 4 inches for those perfect support pieces. Don't forget to sand everything thoroughly and finish with an oil-based stain – trust me, it makes all the difference! The final result will be beyond your wildest dreams: a modern, geometric masterpiece that'll have your guests talking long after the celebration ends.
Minimalist Timber Frame Arch

While geometric designs catch the eye, there's something timelessly beautiful about a minimalist timber frame arch. You'll fall love with how this classic design combines natural wood's warmth with clean, simple lines that'll make your ceremony space absolutely breathtaking! Consider adding floral foam blocks to securely attach fresh flowers along the frame. Additionally, using seasonal flowers can enhance the overall aesthetic and make your arch more cohesive with the time of year.
When it comes to design variations, you've got wonderful options to explore. Western Red Cedar or CLS C24 timber both create stunning results, and you can customize your arch's width and depth to perfectly suit your venue. I've seen couples make their arches anywhere from 54 inches wide to grander sizes – it's entirely up to you!
Let me share some decoration tips that'll make your arch truly magical. Try draping soft, sheer curtains for romance, or weave in cascading greenery like eucalyptus and ivy. The natural wood provides such a perfect canvas for your creative vision! For safety and stability, don't forget to secure those posts firmly into the ground with steel pegs – we want your beautiful arch standing strong throughout your special day!
The best part? With basic tools and some helpful hands, you can build this gorgeous arch yourself. What an amazing way to add a personal touch to your wedding day!
Double Post Garden Arch

Thanks to its impressive dimensions and sturdy construction, the Double Post Garden Arch stands as a magnificent focal point for your wedding ceremony. At 120 inches wide and 96 inches tall, this stunning structure will frame your special moment beyond your wildest dreams!
When it comes to arch construction tips, you'll love how this design breaks down into manageable sections for easy transport and assembly. We've found that using basic structural lumber like 2x4s and redwood keeps the project budget-friendly while ensuring lasting durability. Consider adding weighted supports for maximum stability during your ceremony. You can count on this arch to withstand outdoor conditions beautifully! Additionally, it's essential to prepare for weather changes to ensure your decorations remain intact.
Let's talk about arch decoration ideas that'll make your heart skip a beat! Whether you're planning a rustic celebration or an elegant affair, this versatile design adapts perfectly to your vision. Drape it with flowing fabrics, weave in romantic flower garlands, or add twinkling lights – the possibilities are endless! I especially love how the 24-inch depth at the top provides ample space for creative decorating.
Remember to take into account your wedding's season and time of day when planning your decorations. Trust me, this arch will create the perfect backdrop for your unforgettable "I do" moment!
Recommended Products

Luxury Wedding Arch for Brides & Planners: Designed for couples seeking an elegant, high-end backdrop for their special day to create unforgettable ceremony moments

Latticework Arbor: Classic grid-style arbor strong enough for any plant or climbing vine, complementing your surrounding garden or backyard and blending seamlessly with your outdoor decor

Product Dimensions: 28 x 62 x 96 inches, 26.8 pounds
Ladder Style Wedding Arch

Looking for a uniquely charming wedding arch alternative? You'll fall in love with this creative ladder design that's taking the wedding world by storm! I've seen countless couples transform ordinary ladders into extraordinary ceremony backdrops that left their guests speechless.
Creating your own ladder-style arch is surprisingly simple. Start with two sturdy vintage ladders (the more weathered, the better!) and connect them at the top with a wooden plank. You'll want to secure any folding mechanisms first – safety is key for your special day! Once the structure is stable, let your imagination run wild with wedding decor. Adding nail-secured shelves helps prevent any unwanted folding during your ceremony. I've seen couples drape cascading florals, hang delicate lanterns, and weave ethereal fabric between the rungs. Incorporating natural materials like wood and burlap can enhance the rustic charm of your arch.
What's amazing about this design is its versatility. Whether you're dreaming of a rustic barn celebration or an elegant garden party, your ladder arch can be styled to match! Add romantic touches like twining ivy, mason jar flower vases, or twinkling fairy lights. The best part? You can repurpose vintage ladders to create this stunning focal point while staying within budget. It's the perfect blend of charm and practicality!
Recommended Products

Please note: This listing includes the wooden arch only. Flowers, candles, fabric, greenery, and all decorative accessories shown in photos are not included.

100% Upcycled Reclaimed Wood, Individually Hand Crafted
Curved Top Wooden Arch

From rustic elegance to modern sophistication, a curved top wooden arch creates a stunning focal point for your wedding ceremony. When it comes to wood selection, you've got two fantastic options that'll make your heart skip a beat – the sturdy CLS C24 timber or the naturally beautiful Western Red Cedar. I've seen both materials transform into arches that were beyond our wildest dreams!
Let's make your dream arch a reality! Start by cutting your posts and cross members with a miter saw – precision is key here. You'll want to create those perfect U-notches for connecting everything together. The top piece spans 1487mm for an ideal archway width. What I love most about this design is how the curved top adds such graceful movement! Don't forget those essential angle braces for stability – they're like the unsung heroes of your arch.
For decorative accents, you can add evenly spaced slats using spacers as your guide. Pre-drill those holes (trust me on this one!) to prevent any splitting. Whether you're going for a rustic woodland vibe or elegant garden feel, this curved top design will absolutely take your breath away!
Square Frame Wedding Gate
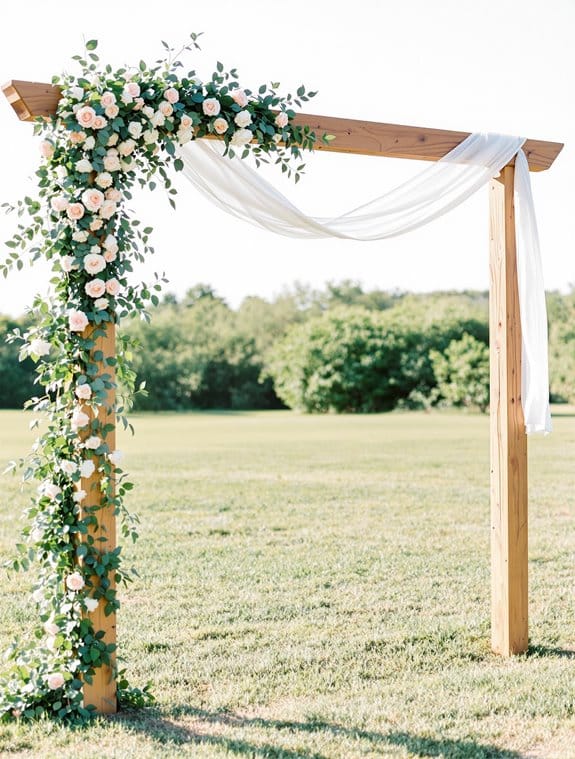
Building a square frame wedding gate delivers both stability and style for your ceremony entrance. Among various wedding gate styles, this classic design stands out for its clean lines and timeless appeal. You'll love how the simple geometry creates an elegant backdrop that won't overshadow your special moment! With weekend assembly time, this project is perfect for DIY couples.
When it comes to frame material options, you've got fantastic choices. I've found that 2x4s work beautifully for a lighter look, while 4x4s create that bold, dramatic statement that's beyond our wildest dreams. The secret to success lies in those precise cuts and strong joints – trust me, your pre-drilling efforts will pay off! You'll want to use wood screws and a Kreg Jig for those sturdy pocket holes. Additionally, consider using eco-friendly materials to promote sustainability in your wedding preparations.
The assembly process is wonderfully straightforward. Start with your outer frame, add those essential center supports, and don't forget those gorgeous 45-degree angle braces! We've seen couples add their personal touch with decorative slats or natural cedar material for a rustic feel. Remember to match your color scheme to your wedding theme – it's these thoughtful details that make your gate truly special!
Rustic Branch Wedding Arch
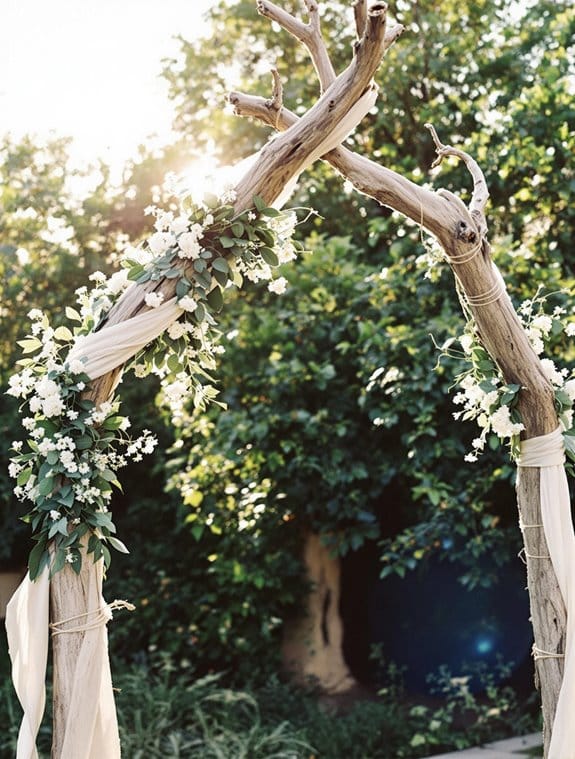
Three essential elements make a rustic branch wedding arch irresistible: natural beauty, organic design, and effortless charm. You'll be amazed at how this stunning creation can transform your ceremony space into something beyond your wildest dreams!
When it comes to branch selection, you'll want to gather sturdy pieces that can withstand the test of time (and weather!). I've found that freshly pruned branches work best, as they're still flexible enough to bend into your desired shape. Focus on collecting various sizes – thick ones for the foundation and thinner twigs for that perfect whimsical touch. With a budget of around $50-70, this DIY project offers an affordable way to create something truly special for your big day.
For decoration ideas, less is definitely more! You can weave in delicate fairy lights that'll sparkle as the sun sets, or add small floral clusters that complement your wedding colors. I absolutely love how these simple additions enhance the arch's natural beauty without overwhelming it.
Building your arch is easier than you might think! Just arrange your branches on the ground first, secure them with screws and wire, and position the finished piece exactly where you want it. Trust me, your guests will be in awe of this woodland masterpiece!
Simple Post and Beam

After exploring the charm of natural branches, let's turn to a classic architectural approach that's both elegant and sturdy. The simple post and beam design creates a breathtaking frame for your special moment, and you'll be amazed at how achievable this project really is!
Start with your cedar posts, ensuring uniform post height of 8 feet for most of the supports, with one taller 10-foot post for dramatic effect. The magic happens when you create those precise U-notches – they're what gives your arch its professional, finished look. You'll want to use your mitre saw carefully here, as these joints are essential for stability. This project will cost about CAD $200 at your local hardware store. Incorporating layering different lighting sources can enhance the overall atmosphere during your ceremony.
What I love most about this design is how the decorative finishes can transform it from simple to spectacular! Add your black wood screws for a touch of elegance, then dress it up with sheer curtains or twinkle lights. The 45-degree angle braces aren't just for support – they add such beautiful visual interest! Don't forget to pre-drill your holes for the slats, using spacers to keep everything perfectly aligned. Trust me, your guests will be stunned by the results!
A-Frame Wedding Arbor
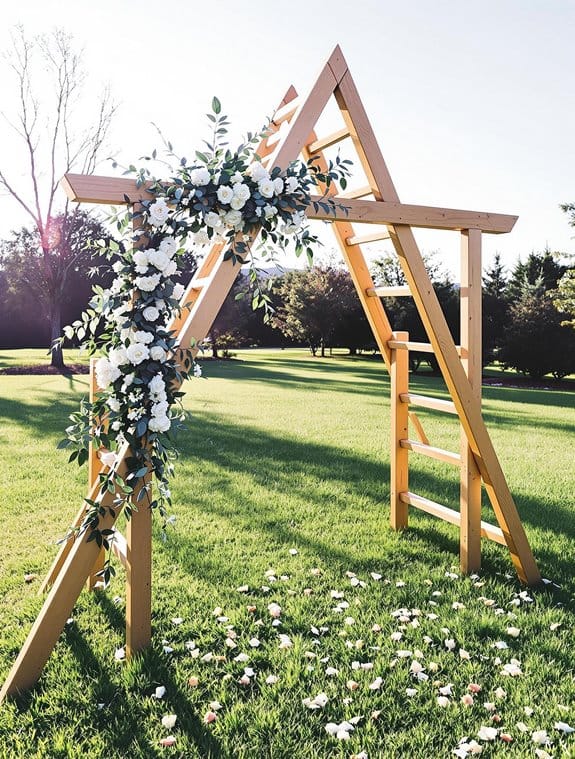
The classic A-frame design offers a striking silhouette that'll make your wedding photos truly memorable. When it comes to design inspiration, you can't go wrong with this timeless shape that's both elegant and sturdy. I've seen countless couples fall in love with the A-frame's dramatic angles and versatile decorating potential! Many DIY builders choose to create three detachable sections to make transportation easier.
For your construction materials, you'll need either pressure-treated lumber or beautiful western red cedar – both are excellent choices. Start by cutting your wood to size (about 7 feet tall is perfect), and use a mitre box to create those essential 45-degree angles that give the A-frame its distinctive shape. You'll want to add 26-inch braces on both sides for extra stability – trust me, you'll be glad you did!
The real magic happens when you start decorating! Drape flowing white fabric from the top, add twinkling string lights, or create a stunning display with silk flowers and greenery. We've seen couples transform simple A-frames into breathtaking focal points with sheer curtains and natural elements. Don't forget to pre-drill your holes to prevent splitting, and use spacers to keep everything perfectly aligned!
Frequently Asked Questions
How Long Before the Wedding Should I Start Building the Arch?
Like planting a garden that'll bloom on your big day, you'll want to start your arch design 3-6 months ahead. Your building timeline should include planning, construction, and testing to guarantee everything's perfect.
Can Wedding Arches Be Safely Used on Uneven Outdoor Terrain?
Yes, you can safely use wedding arches on uneven terrain if you're mindful of stability concerns. With proper terrain adaptation like adjustable legs, ground anchors, and weighted bases, you'll guarantee your arch remains secure.
What Type of Wood Best Resists Outdoor Weather Conditions?
With an 80% higher decay resistance than most woods, Western Red Cedar's your best bet. You'll love its natural oils and water resistance, though pressure-treated lumber offers a more budget-friendly weather-resistant alternative.
How Much Weight Can the Arch Support for Hanging Decorations?
You'll want to keep decorations between 11-20 pounds total, with careful load distribution. Choose lighter decoration types like silk flowers and fabric draping. Don't exceed your arch's capacity for safety.
Are Building Permits Required for Temporary Wedding Arch Installations?
While your special day's enchanting framework may seem minor, you'll want to check local permit regulations. Many areas require permits for temporary structures, even wedding arches, depending on size and location specifics.